Create Salesforce Custom Object using Apex Class

Custom Objects and Custom fields in Salesforce

I recently got this requirement to create a custom object from Apex.
Custom objects, fields, permissions, and all other configurations can be done using an Apex class.

  • Download the provided files
  • Create the Apex class ‘MetadataService.cls’ and its Test Class ‘MetadataServiceTest.cls.’
  • Create a new Apex class, ‘CreateCustomObject.cls.’

Execute the code in execute anonymous window to create the custom object.

CreateCustomObject.creatObj();

Try to utilize the other methods from the class as well.

Yeshas Konduru
Date 04/11/2023

Deleting Apex Classes / Apex Triggers from Production using Workbench

This is a rare scenario which we might face when not using any IDE or Source Control as part of the Salesforce Development.

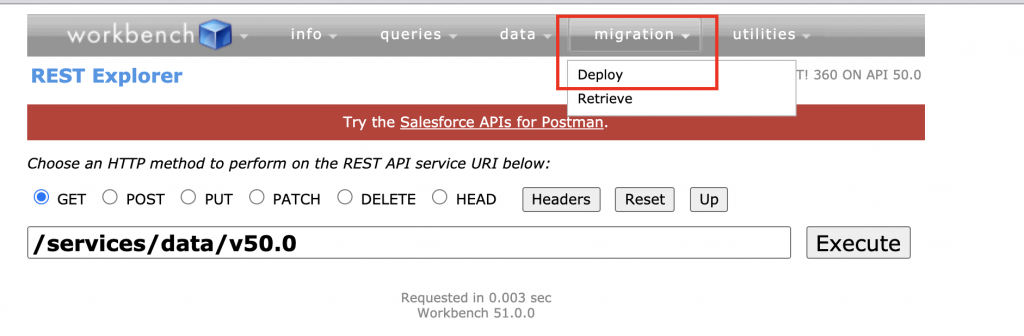
In order to Delete Apex Classes / Apex Triggers from Production directly using Workbench, Follow the steps from this post and complete your task efficiently.

  1. Open Notepad
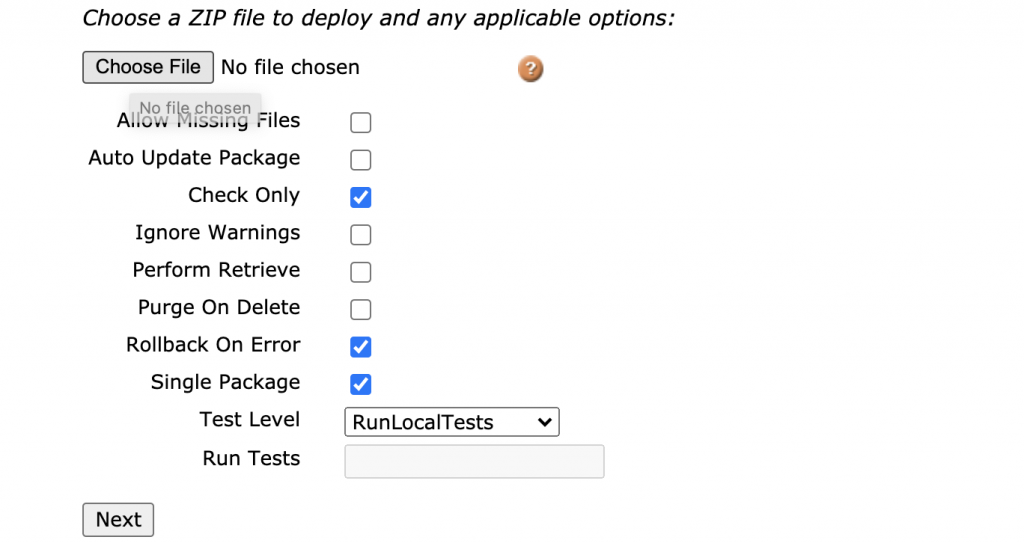
  2. Copy the below text and save it as “package.xml” (All files).
    (Update the Version number accordingly)
<?xml version="1.0" encoding="UTF-8"?>
<Package xmlns="http://soap.sforce.com/2008/04/metadata">
<version>50.0</version>
</Package>

3. Create another file, copy the below text and save it as “destructiveClasses.xml” (All files).
(Update the Version number accordingly)

<?xml version="1.0" encoding="utf-8"?>
<Package xmlns="http://soap.sforce.com/2008/04/metadata">
<types>
        <members>Class1</members>
	<members>Class2</members>	
	<name>ApexClass</name>
</types>
<types>
        <members>Trigger1</members>
	<members>Trigger2</members>	
	<name>ApexTrigger</name>
</types>
<version>50.0</version>
</Package>

The above file is based on assumption that you want to delete 2 Apex Classes and 2 Apex Triggers. Adjust based on your requirement.

Note: File names should be as mentioned in Point 2 and Point 3

4. Create a new folder with Name: “deleteClasses” and Drag & Drop the above 2 files.

5. Open the folder and Select those 2 files > Right Click and Select “Send To Compressed Folder

6. Name the Compressed folder as “package.zip

7. Open Workbench > Login with Org Credentials

8. Click on Migrate Tab and Choose Deploy

9. After clicking on Deploy
Select Check Only (For Validation before deployment)
Rollback On error
Single Package
RunLocalTests

10. If the validation is Success, Uncheck the “Check only” checkbox and continue the deployment.

Chandra [03/02/2021]

How to resolve? This page has an error: Sorry to Interrupt

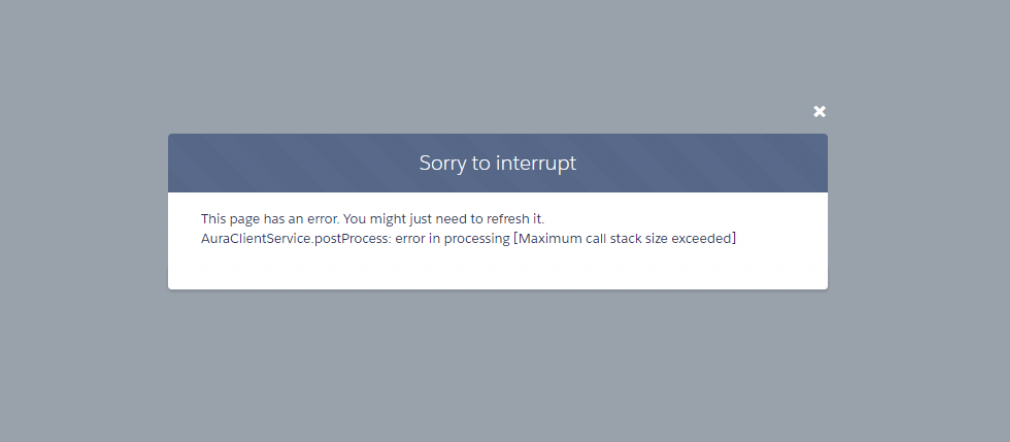
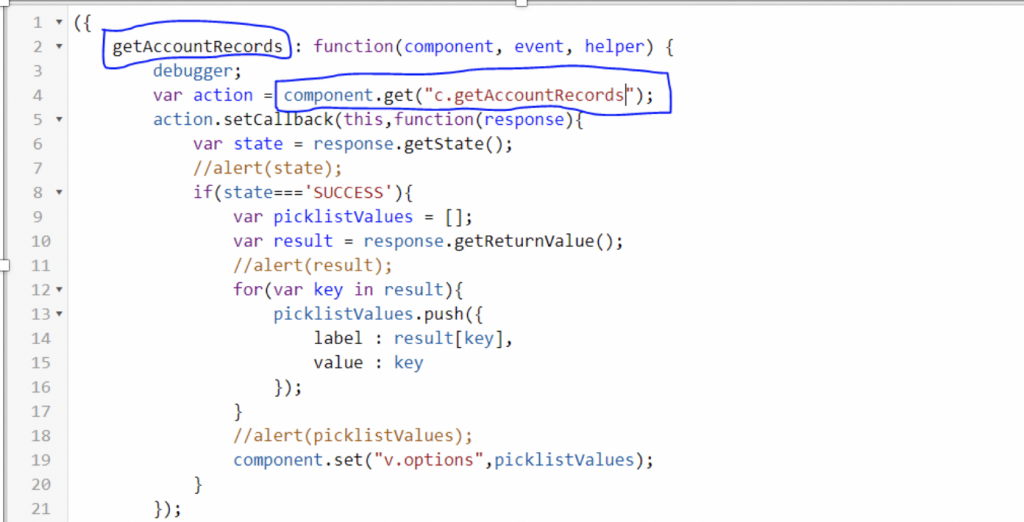
This page has an error. You might just need to refresh it. AuraClientService.postProcess: error in processing [Maximum call stack size exceeded].

As per the document, it is recommended to use different names for the client side and server side methods/actions.

Use unique names for client-side and server-side actions in a component. A JavaScript function (client-side action) with the same name as a server-side action (Apex method) can lead to hard-to-debug issues.

So all you need to do here is, change your client-side controller’s method getAccountRecords to something like getAccountRecordsData.

Yeshas K.

Deleting Related Records

The delete operation supports cascading deletions. If you delete a parent object, you delete its children automatically, as long as each child record can be deleted.

For example, deleting the account you created earlier (SFDC Account) will delete its related contact too.
Execute this snippet in the Anonymous Apex window of the Developer Console.

Account[] queriedAccounts = [
SELECT Id
FROM Account 
WHERE Name='SFDC Account'
];
delete queriedAccounts;

Check the accounts and contacts in your org.
You’ll see that both the account and its related contact were deleted.

Yeshas K

Reset Password from Developer Console

There are instances where Reset Password option gives trouble and we do not receive the Email Link to reset the password.

Here is the best solution to directly reset the password from Developer Console itself..

Open Execute Anonymous Window and run the below command:

System.setPassword(UserInfo.getUserId(), ‘YourNewPassword’);

This should help in resetting the password instantly.

Chandra V[09-10-2019]

Apex Crypto And Decrypto Class

public class EncryptAndDecryptHelper {
    
    public static String encriptString(Blob key, String data){
        try{
            Blob bdata = Blob.valueOf(data);
            Blob encrypted = Crypto.encryptWithManagedIV('AES128', key, bdata);
            return  EncodingUtil.base64Encode(encrypted); 
        }catch(Exception e){
            system.debug('exception'+e.getMessage());
            return '';
        }
        
    }
    public static String decryptString(Blob key, String decryptString){
        try{
            Blob DecodedEncryptedBlob = EncodingUtil.base64Decode(decryptString);
            Blob decryptedB = Crypto.decryptWithManagedIV('AES128',key, DecodedEncryptedBlob);
            return decryptedB.toString();   
        }catch(Exception e){
            system.debug('exception'+e.getMessage());
            return '';
        }
         
    }
    
}

Ranjith T [03/09/2019]

Algorithm to generate the unique id in salesforce using Apex

There might be scenarios where we as a developer needs to generate random unique ID’s to be used for external integrations in Apex.

Here is a simple method which generates the unique code everytime.


public static String getUUID()
{
        Blob b = Crypto.GenerateAESKey(128);
        String h = EncodingUtil.ConvertTohex(b);
        String guid = h.SubString(0,8)+ '-' + h.SubString(8,12) + '-' + h.SubString(12,16) + '-' + h.SubString(16,20) + '-' + h.substring(20);
        system.debug(guid);
        return guid;
    }

Sumanth A [03/08/2019]

Steps to Enable Event Monitoring dashboards in PROD/Sandbox

Hello!!

I am going to produce the steps to Enable Event Monitoring dashboards in Salesforce Sandbox /Production Environment….

Pre-Requisite: >> Enable Analytics >> Setup >> Analytics >> enable Analytics (This is a major step without this you won’t see analytics studio app)

  1. Setup >> Event Monitoring >> Enable Login Forensics and Event Log File Integration with Event Monitoring Analytics App
  • Open Analytics studio app >> Click on that and a new tab will open (FYI., pop up from browser might block this so set it to allow)
  • Create >> Click on it
  • Follow the below screen steps
  • You will see steps 1 to 5 don’t change anything except the no. of days to 30
  • Name the App “Event Monitoring App”
  • The app will run and you will see the below screenshot and an email will be sent once its ready.

Hope you got all the details!

Anil B [03/03/2019]

Email Quick Action missing in Feed Tab

In this post, I am going to provide you with the steps to debug the issue: Email Quick Action missing in the feed Tab…

  1. Login to salesforce Sandbox (www.test.salesforce.com) or Production org
  2. Navigate to the app (ex. Service console) using app launcher
  3. Open Case page and check if the quick action is visible
  4. Follow the below steps only if quick action is not visible
  5. Setup>>Object Manager>>Case object>>Case Page Layouts>>check if the quick action is added to the case page layout
  6. Drag and Drop the quick action into the layout and click save
  7. Even now if the quick action is not visible now then please follow the below steps
  8. Setup>>Administer>>Email Administration>>Deliverability>>Set Access to Send Email (All Email Services) to All Email>>Click Save.
  9. FYI., Screenshot for reference

Anil B[03/03/2019]

Connecting Sandbox (Dev) to Visual Studio code For Developing Lightning Web Components(LWC)

Here, I am going to present you the steps to connect the Sandbox to Visual Studio Code for connecting the Lightning web Component…

First step: Install Salesforce Extensions for Visual Studio Code

screenshot for Extensions in VS Code
Lightning Web Components Extension

Login in to Sandbox and Use the below command in the Terminal

sfdx force:auth:web:login –setalias my-hub-org –instanceurl https://test.salesforce.com

After logging in…

  1. Use ctrl+shift+p
  2. Enter Sfdx:create Project
  3. Select the Source where you want to create Project.

To Create Lightning web Component use the Below Command in Terminal

sfdx force:lightning:component:create –type lwc -n myComponent -d force-app/main/default/lwc

AND Finally to deploy use the command below:

sfdx force:source:deploy -p force-app -u  test@example.com(user name of the Sandbox)

Also, Follow the Link below for better experience on Lightning Web Component:

https://trailhead.salesforce.com/content/learn/projects/quick-start-lightning-web-components

-Ranjith T [02/25/2019]